


I’ve had failed lettuce seedling in the first two weeks into Kratky hydroponics. Based on observation, several factors played in the success and failure of my seeds to grow into healthy plants – the summer heat, the lack of light exposure, quality of seeds (none of my cilantro seeds sprouted); and excess or lack of water. I knew, even before I started, that this would happen. I was not discouraged by it, however, and continued by replanting seeds and adjusting whatever needed was lacking or excessive. I even went as far as changing jars and disposing nutsol suspecting I may have not mixed them well.
The first factor, the summer heat, appears to be the contributory reason why some of my plants didn’t thrive. I check my plants everyday for signs of wilting, root damage, and foliar health. I noticed that when my “pechay” and lettuce were exposed in full sun from 6-10 AM, I observed signs of wilting at around 9 AM. This led me to change the plants’ position from the sun’s rays, even went as far as adding net curtain on my window despite the fact that it was not allowed in our condo. Still, the wilting happened. So after taking out some of the dead plants, mostly lettuce and pechay, I planted seeds anew. I waited for the seeds to grow 4 leaves before transferring them to bigger Kratky hydro jars. Because these plants were apparently more sensitive to heat, I decided to put them under grow lights instead.
Grow Lights
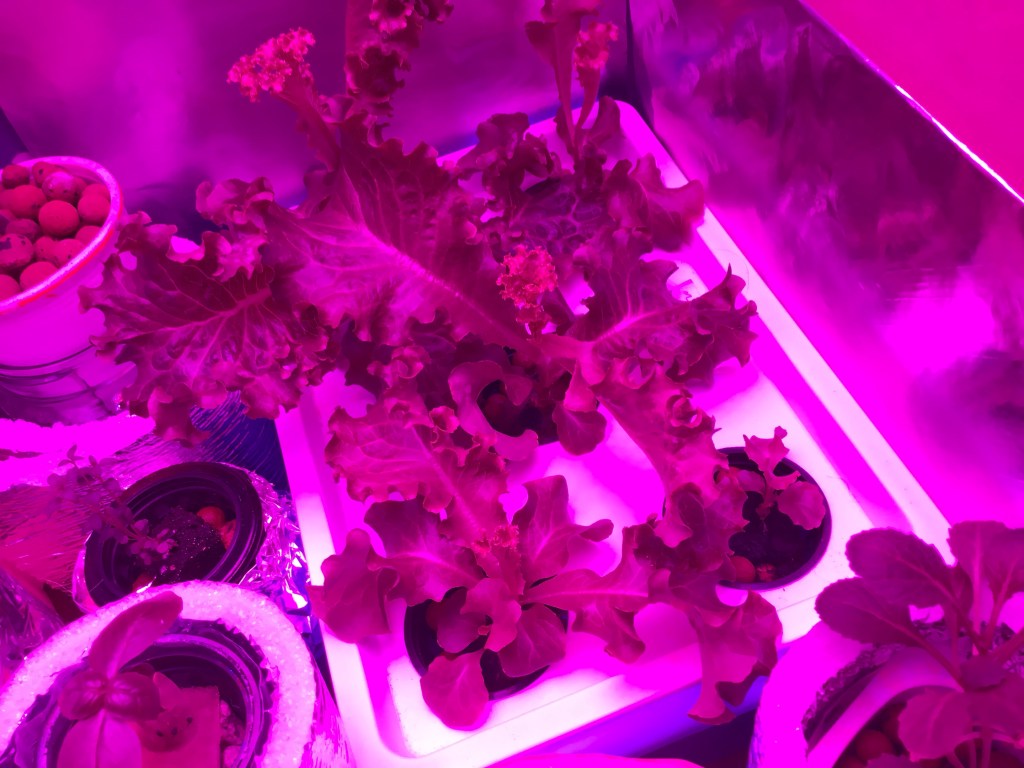
To maximize the light, per advise by members of a hydroponics group, I added illustration boards covered in aluminum foil at the two sides of table and later on added insulating sheets at the other two sides thereby fencing the plants in, so that light will bounce off and hit the plants on all sides. When one of the mustard plants seating by the window showed signs of wilting, I also sat it beside the lettuce under this grow light and it showed improved appearance.
I read that the red and blue light spectrum is great for green leafy vegetables from seedling to mature plants. So when someone offered to sell me his secondhand LED grow light, I did not hesitate to buy it from him. It was a good deal that I could not pass up especially because supplies were hard to get by due to this pandemic. I noticed that in two weeks of exposure, lettuce under this grow light shot up like crazy. It was as if they had only been waiting for this grow light all along. I was happy to see my lettuce grew at such a rapid rate that I’ve also added my mustard, basil, thyme and tomato seedlings on the table beside the lettuce.
When other plants started showing signs of wilting, I decided to add insulators around the hydroponic jars after realizing that the heat is possibly heating up the nutsol, thus, cooking my plants’ roots. The socks, white paint, and aluminum foils weren’t enough to protect the plant from the summer heat. I then decided to add and try out another type of grow light which is a simple 6500K LED bulb emitting 800 plus lumens from a local hardware, ordered online.
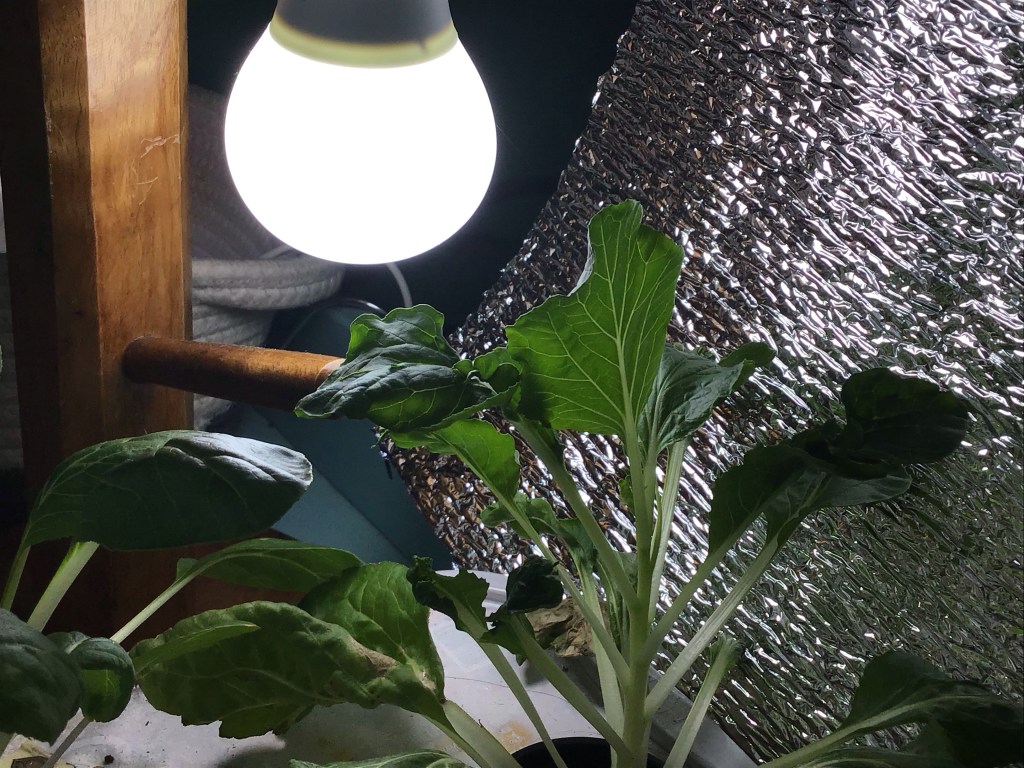
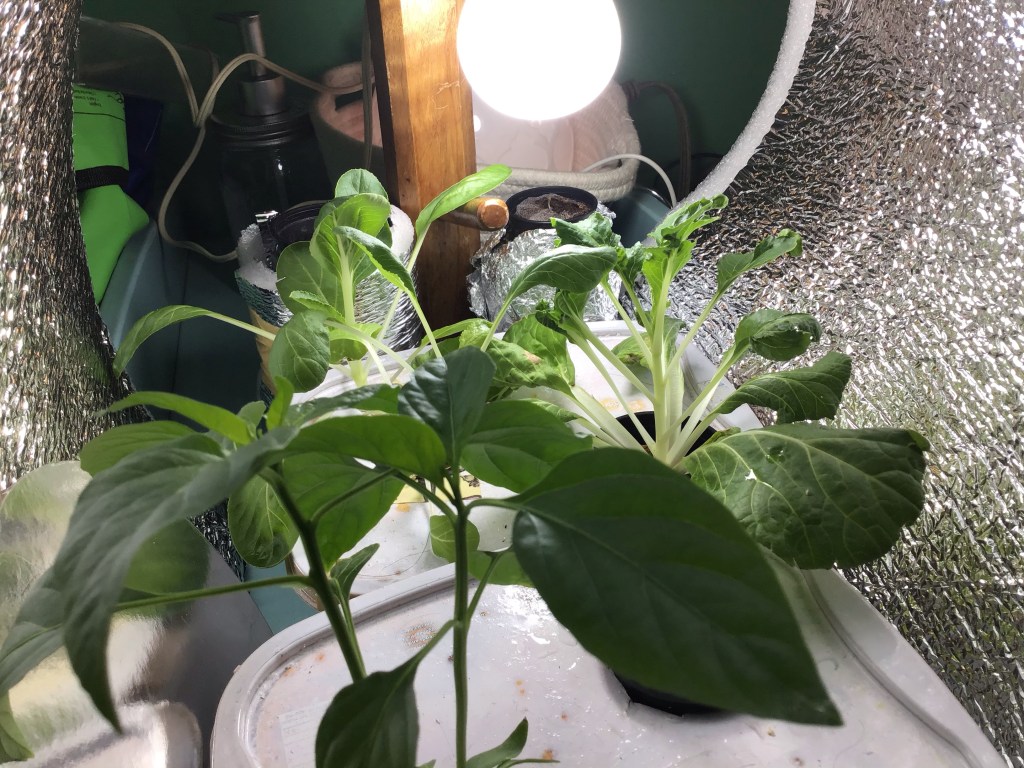
Although it was recommended by some of the gardeners I followed on Youtube, I wasn’t totally convinced that the bulb would work. So when I bought the bulbs, I was a skeptic who was gonna use the bulbs as study lamp in case they didn’t work for my plants. Turned out I was wrong – the bulbs did work. I noticed new leaves growing out of the pechay plant that was dying on me prior to exposure to this bulb (photo above). I also noticed that the leaves of my bell pepper and young lettuce had turned their leaves towards the bulb – which tells me that phototropism is happening.


When a friend offered to buy loam and garden soils for me, I immediately said yes. In case you don’t know, the reason why I didn’t go into soil gardening was because I almost killed my husband’s plants (he was the green thumb) twice before. After that, I felt that I had a black thumb for gardening. By now, I have an appreciable rate of success in Kratky Hydroponics, I decided to give soil gardening a try again.


One of my qualms before I got into urban gardening and hydroponics was that there won’t be anyone to attend to the plants while we are away for vacation. So when I started planting, one of the things I looked for online was a sort of automatic irrigation system for my plants. I found ones that look complicated that I gave up. When I typed in “self-watering device” on Shopee without really knowing what to look for, I came across a photo of this spike (photo above) with tiny faucet. I got intrigued and decided to order. But because of the pandemic, Shopee had limited the items available for ordering for essential items, the spike, sadly was excluded. Two week into quarantine, gardening items were declared essential, possibly due to influx of people deciding to grow their food, that the spikes became available for online purchase. I ordered a set of 12 which arrived today. I tested them on my plants and was sadly disappointed at first the the water was not dripping. I realized that air needs to be inside the bottles so I poke a hole on the top portion of each bottle to let some air in (bottles were half full) and water started pouring out of the tiny faucets. I then regulated the flow of water using the tiny knob to mere drops because I don’t want to drown my plants.
Then, an idea struck me that I can also use the spike to refill nutsol into my hydroponics jars. Among my plants, tomatoes, basil and white sitaw consume the most amount of nutsol. If I were to be gone for two days, I was pretty sure that these plants will run out of nutsol because the jars they are planted in are less than 1.5 L in volume. So I am testing the spike now on one of my tomato plants just to see if I need to adjust the rate of recharge from the spike.


Since a lot of people from outside the Philippines are asking where they can possibly get some of the products mentioned here, I am including my affiliate links with Amazon below. Please take note that by buying these stuff through my affiliate links, I get a bit of commission that will help me fund this website and keep it up and running.
Discover more from The Fabulous Scientist
Subscribe to get the latest posts sent to your email.

2 thoughts on “Kratky Hydroponics: Effective Grow Lights for My Plants”