
INTRODUCTION
Kids, have you ever found yourself wondering what the earth is made up of? If you dig a tunnel as deep as your house, what will you find underneath? Will you find dirt, or treasure, or perhaps a dinosaur fossil?
When I was your age, I liked looking down pits that adults dig up whenever they’re building a house. Once, I saw my dad digging up a pit as deep as his height was and noticed how as he dug deeper, he seemed to have a hard time breaking down the hard rock underneath that he needed hands to help him finish the hole. The next day, to my amazement, I noticed water gushing out at the bottom and in hours, the hole was half filled with water. Dad told me that he hit a spring and soon neighbors started getting water off our “well” for their household use. Back then, we didn’t have pipes and faucets, only that dug well as our water source.
Whenever the whole family travel to distant places, I would look out of the window to observed everything outside, including rock outcrops along road cuts. Some of these outcrops looked uniformly coloured either light or dark. Others looked like layers of sponge cake of varying flavors – chocolate, mocha, and vanilla. Still others looked like a hodgepodge of boulders mixed with soil that I imagined there were giants a long time ago who hurled rocks at each other during their fights – resulting in the messy heaps of rock and soil. One time, I even saw an outcrop that twinkled under the sun, I wondered if it was made up of stars that had fallen from the sky.
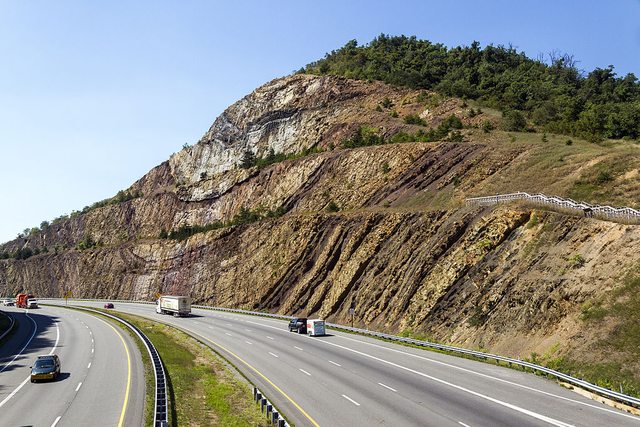
An example of a road cut showing a rock outcrop exhibiting layers. (Source: https://engineering.stackexchange.com/questions/2270/why-do-earth-cuts-sometimes-have-steps-on-their-walls/2274)
One of the first books I have ever owned was a book by Jules Verne, Journey to the Center of the Earth. It was a story about a scientist and his nephew who went to Iceland for an expedition to go deep down the earth through a dead volcano they believed to lead towards the center of the earth. Along the way, they saw different types of rocks and creatures that are none like the ones ever observed on the surface of the earth. They saw a vast ocean at the center of the earth and got out by getting exploded out of an active volcano in Italy. It was such a good book that although I knew the book was fiction, the possibility that the center of the earth may have a vast ocean where creatures never seen on earth lurk didn’t leave me for a while.

I know better now, of course…
The earth’s depths and center don’t look anything as described by Jules Verne in his book – it’s not made up of ocean where creatures lurk in its depths. But Jules Verne is right in one regard – if someday it becomes possible by technology to bring people from the surface towards the center of the earth – they would see that the earth is basically made up of different layers of rocks. The rocks would contain minerals, and/or animal and plant remains (Geologists call them fossils) in varying shapes and sizes, not live ones as mentioned in the book. There would also be spring waters gushing out of the rocks but as you go deep into the earth, the rocks would be dry, there won’t be any source of water at all. The temperature would be so hot, eventually, the rocks around you would be partially melted like magma. It won’t be as magical or fantastical as Jules Verne described it in his famous book though wouldn’t it be nice if it was so?
(In case you don’t know, I conduct Geology Tours for homeschooling families to help them understand basic Earth Science.)
What are rocks?
Now that you know rocks make up the bulk of our planet earth, let’s now define what are rocks and their physical characteristics. Have you seen a quarry before? If you haven’t, it usually looks like the photo below:
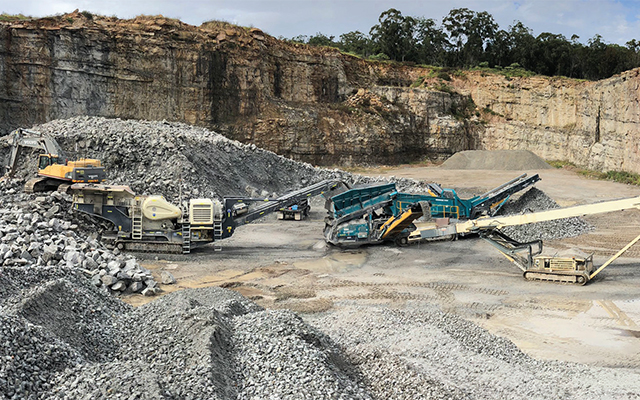
(Source: https://www.quarrymagazine.com/2019/01/04/family-business-aces-it-with-upsized-scalper/)
Young kids are usually not allowed to go inside a quarry because of moving heavy equipment and trucks and the ever present danger of falling rocks. But if you do get a chance to get close to an exposed rock in a quarry or along a road cut, you would notice that it is made up of particles of varying sizes that look compacted or cemented together. Rocks may look similar to concrete that make up our roads, bridges, and buildings, except that rocks are not man-made, like the concretes are. Rocks are formed because of the natural processes that occur on the earth – from the eruption of the volcanoes to erosion caused by rivers flowing from the mountains towards the oceans, the process is best described in a rock cycle. We will talk about rock cycle in my next lesson.
Rocks are aggregates of many different mineral grains which are fused, cemented, or bound together. Their composition and appearance vary depending on which part of the earth they were formed. Geologists study rocks mainly to tell where they come from. Some rocks were formed from cooling volcanic lava; some were formed at the bottom of the ocean; while others were formed deep within the earth.
What are minerals?
Minerals comprise the bulk of rocks. A mineral is a solid with definite chemical composition and atomic structure. Take your table salt for example. A grain of salt is a mineral that forms naturally when seawater dries up. A table salt exhibits cubic crystal form and has chemical composition of NaCl (sodium chloride). Geologists call salt a fancy name, halite.
Have you seen a volcanic magma on TV or on the internet? Magma is actually a molten rock that comes out of a volcano when it is erupting. But did you know that sometimes magma does not come out of the volcanic crater at all? Instead, some magma cools down and solidify while inside the volcano. When that happens, the solid rock that forms is made up of large crystals that are fused together like the diorite rock below.
(I’ve written an article about how to teach your kids phreatic eruption of Taal volcano.)
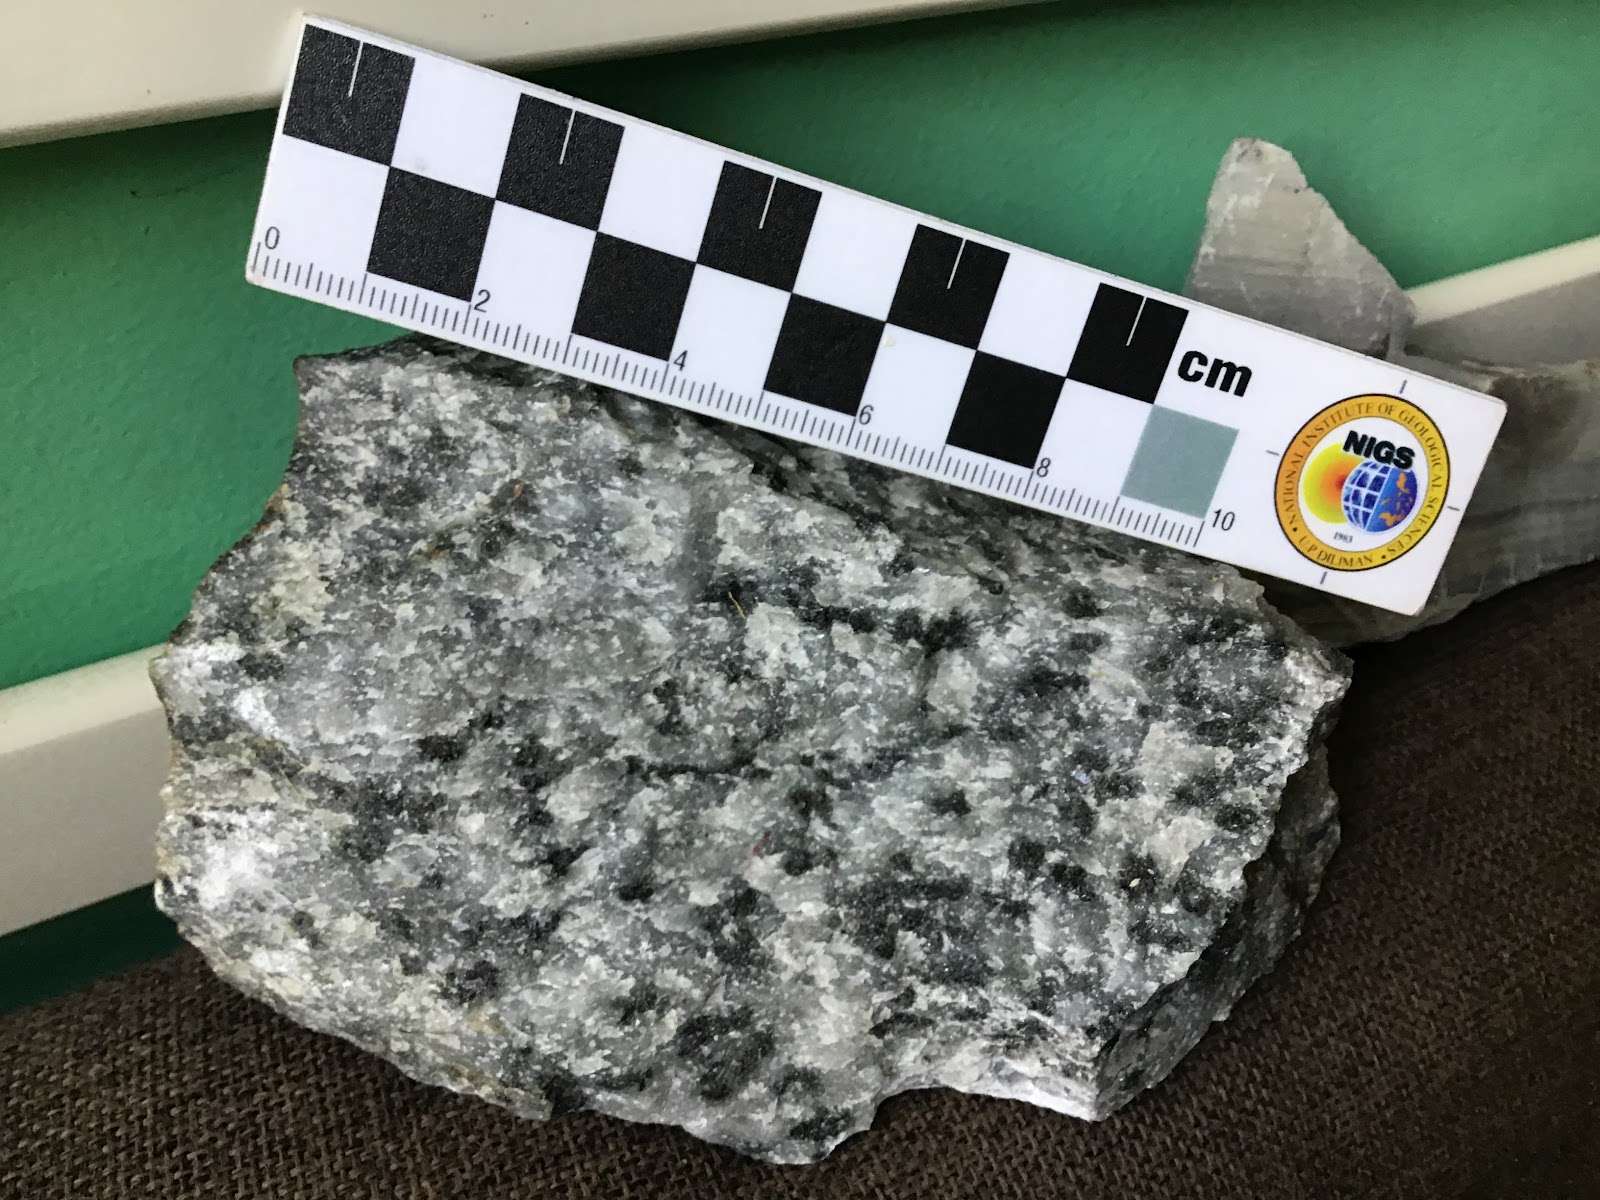
A rock, diorite, is simply a magma that solidified while inside the volcano.
Look at the photo above. Can you see individual minerals in the rock, diorite? The white minerals are called plagioclase, whereas the dark green minerals are called pyroxene. Diorite is coarse-grained rock where minerals are visible to the naked eye. Do you notice how the minerals look fused together? If you are to go down inside the dead volcano as the characters in Jules Verne’s book did, you will see a lot of rocks similar to the one above because this type of rock typically forms inside volcanoes and is a product of magma that solidifies instead of getting spewed out of a volcanic crater.
(If you want to see how Mt. Apo’s crater looks like, I’ve written about in one of my blog posts.)
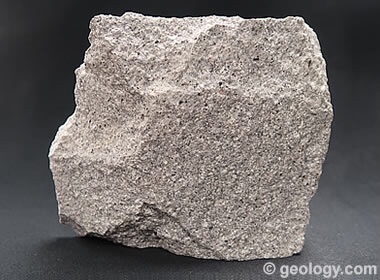
There are rocks that are fine-grained, which means, the minerals are so small, you would need a high power microscope in order to see the individual grains that comprise them. Below is a photo of a fine-grained rock, mudstone. The reason why it’s called so is because this rock consists of very fine grains that are the size of silt and clay. Most mudstones were formed underneath a large body of water such as oceans or lakes usually thousands to millions of years ago. When the water dried up, the sediments underneath compacted and became rocks – a process that usually takes hundreds to thousands of years.

This is a mudstone. Can you find the individual mineral grains in this rock? If the answer is no, that’s okay. Some rocks were just made like that.
Of course, there are also rocks whose grains are small but you only need to look at the them through a magnifiying glass or a hand lens in order to see individual grains, we call them medium-grained rock. Take dacite rock for example. Sometimes magma does get spewed out of volcanic crater during an eruption and when that happens, the temperature difference from where it came from and the surface of the earth is huge, that it starts to solidifies almost immediately giving less time for minerals to grow thus, the rock that form conists of medium size grains.
Another example of a medium grained rock is a sandstone. Have you ever been to the beach and played with sand? Millions of years ago, similar sandy beaches existed on earth that got buried and compacted due to changes on earth (we will discuss this in Rock Cycle lesson) thus, forming the rock we now call sandstone. Sandstones are amazing. When I was in Brisbane, Australia, some of their churches there were made of sandstone bricks!

By now, you know at least three different types of rocks based on the size of their grains: fine-grained rocks, medium-grained rocks and coarse-grained rocks. Coarse-grained rocks consist of mineral grains that are big enough and can be distinguished individually by shape and color using the naked eye. You would need a magnifying glass to distinguish the individual grains of a medium-grained rocks. Whereas, fine-grained rocks consist of very fine mineral grains that cannot be distinguished individually by the naked eye nor the magnifying glass.
Here’s an activity that you and your parents can do as part of your homeschooling lesson:
Materials: A collection bucket, a pair of gloves, a magnifying glass, a pen and notebook
- Go to your garden or nearby park.
- Collect rocks in a bucket, making sure that you don’t disturb the plants and animals in the vicinity of the rocks.
- Clean the rocks.
- While the rocks are still wet, bring them to light and look at each rock closely.
- Describe the rock by indicating whether it is coarse-grained, medium-grained or fine-grained. You may also describe the rock in terms of its shape, the dimensions (use a ruler for this) in terms of height, width, and thickness; the overall color; and luster (dull or sparkly).
- Write down your observation on your notebook.
- Name each rock in your collection by wrapping them in paper and writing the name on the cover.
- If you’re feeling artsy, you can also paint your rock as an art project as in photo below:
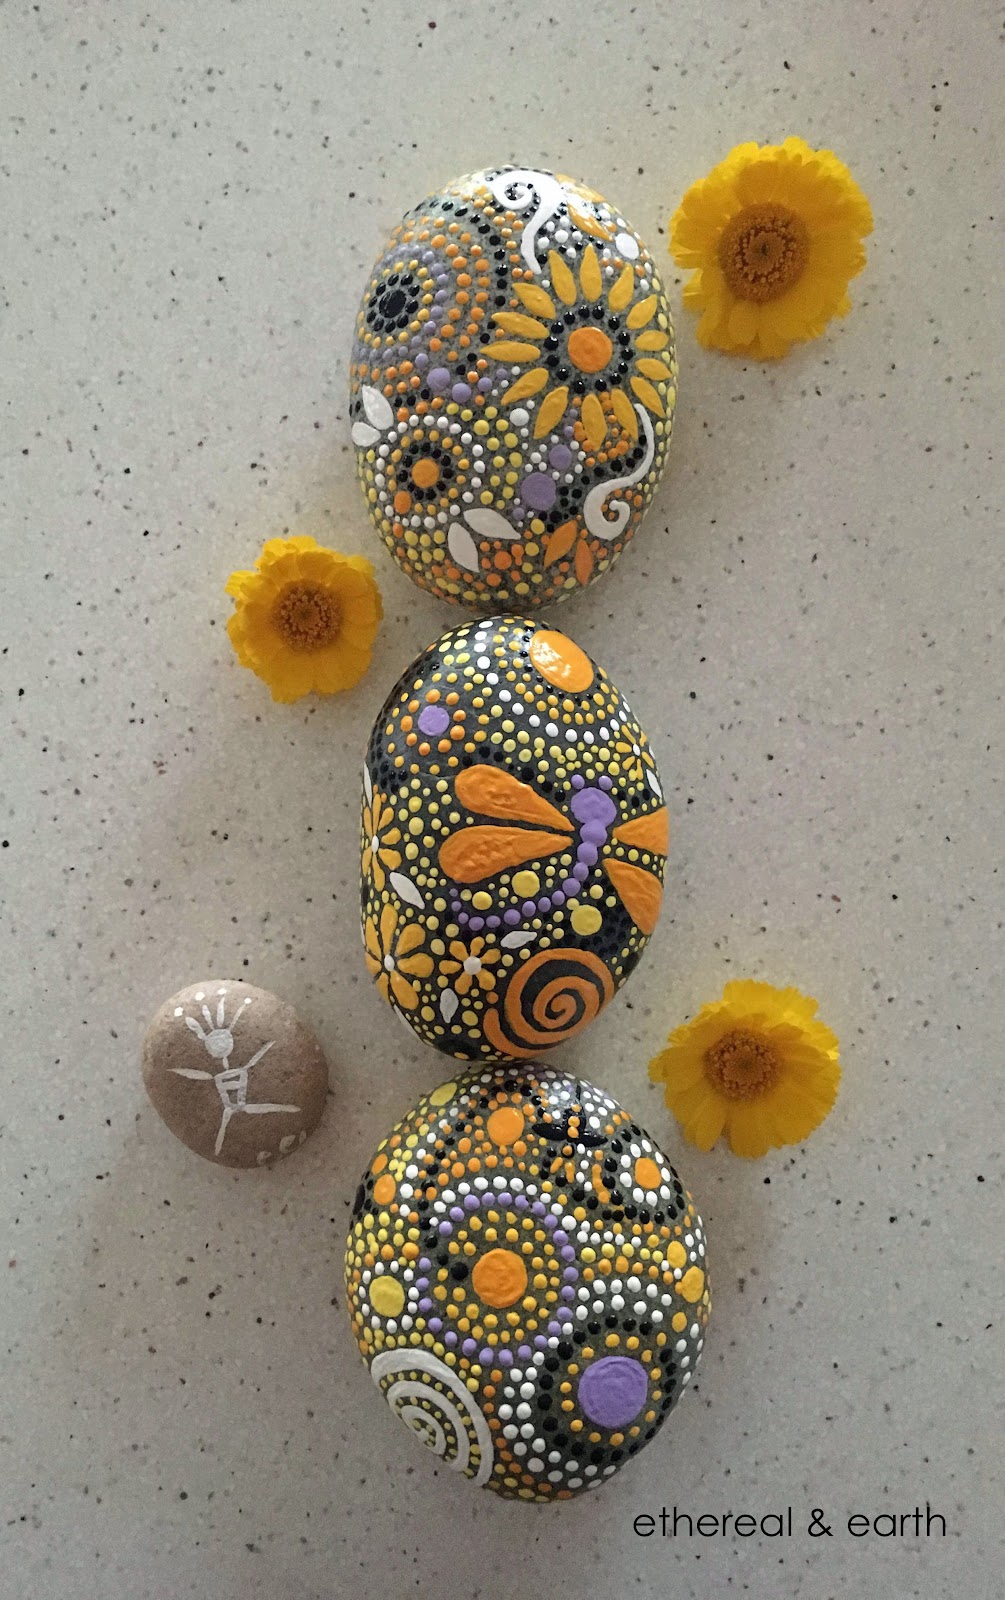
Painted rock. (Source: Pinterest)
Now that you’ve learned what is a rock and how to describe it, let’s now focus on its basic component which is the mineral, in more details.
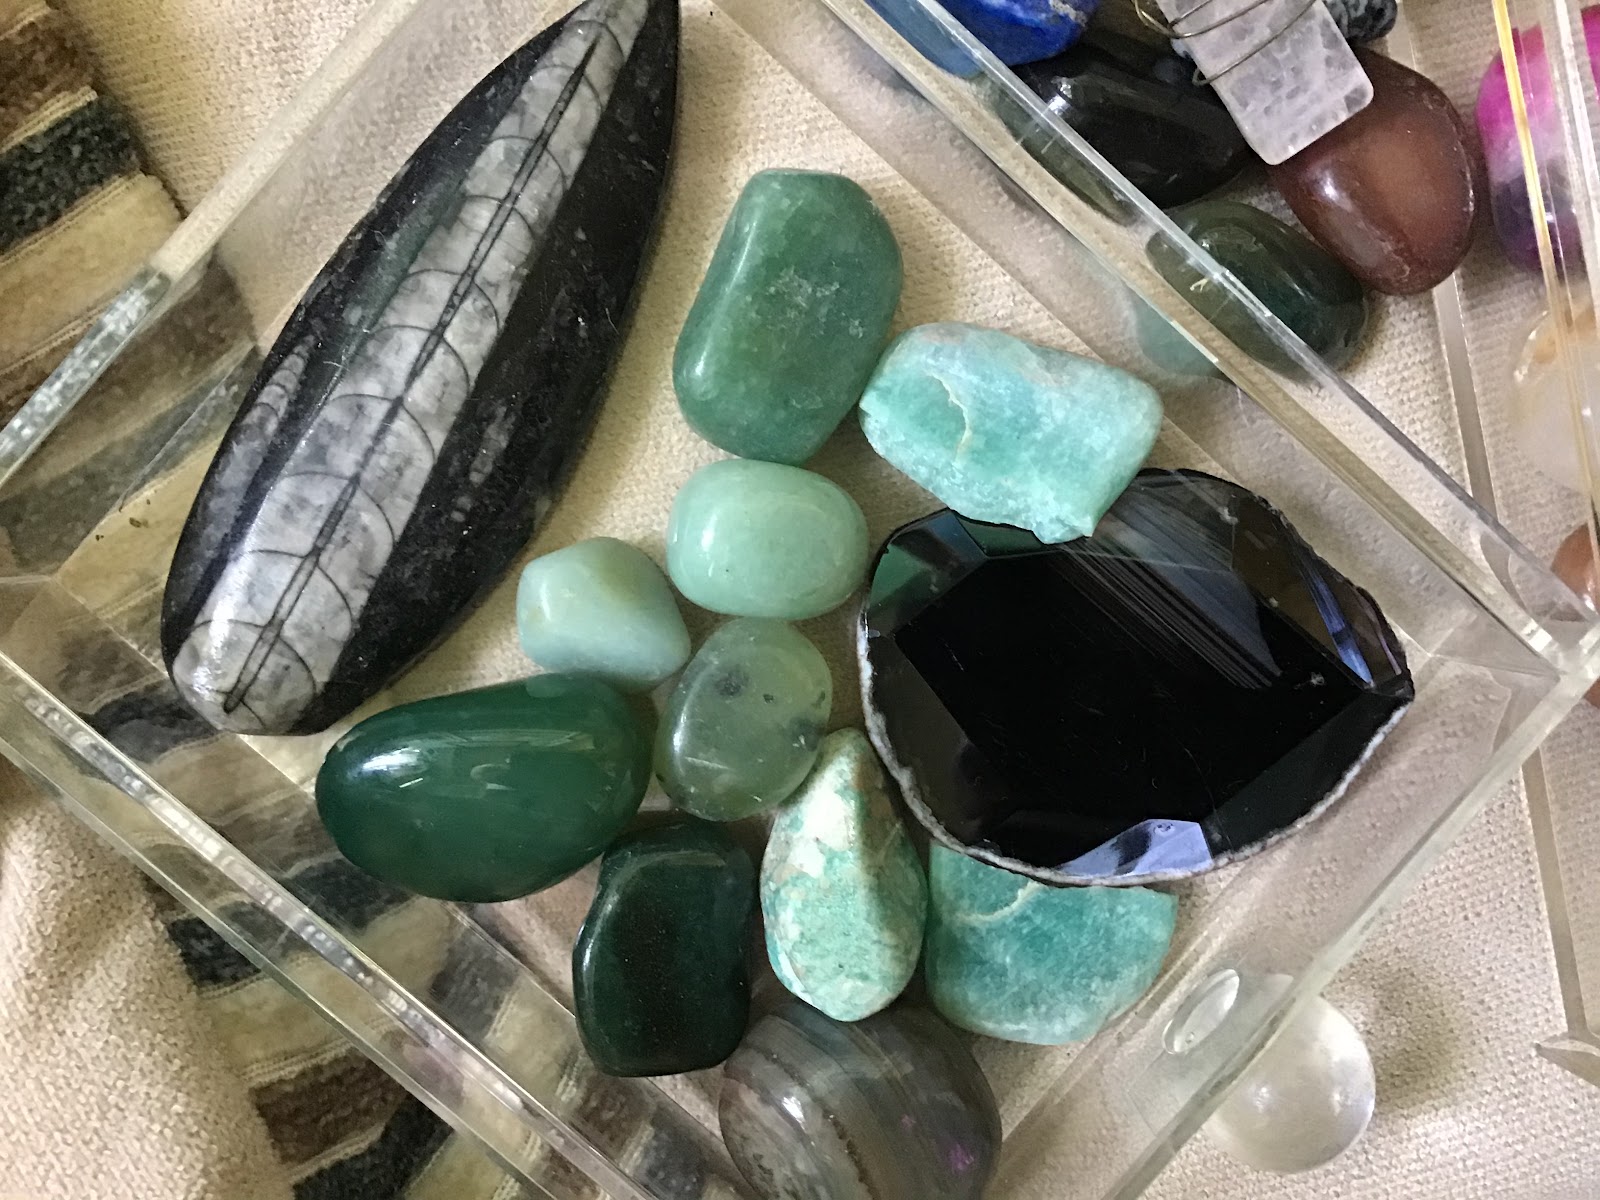
My personal collection of minerals and a fossil.
Early on, we learned that rocks consist of minerals and that if the rock is coarse-grained, the minerals may be identified and described individually in terms of shape and colors. There are thousands of naturally occurring minerals on earth that geologists needed to classify them into groups – usually based on their chemical composition. However, we won’t discuss chemical composition here because that topic might be too advanced for you.
Instead, we will discuss how minerals are described by geologists in terms of their physical appearance: color, streak, luster, transparency, and habit. There are other physical properties that minerals exhibit but let’s focus on these five physical characteristics for now for simplicity’s sake.
Color
The color of a mineral is the most obvious identifying feature of a mineral, thus, it’s the first thing that we geologists use to describe a specimen. Minerals come in colors you can possibly think of; in fact, a single mineral may exhibit different colors as in the case of diamonds, tourmaline, fluorite, quartz, and agate. For example, the minerals fluorite and tourmaline below exhibits multiple color in just one specimen!
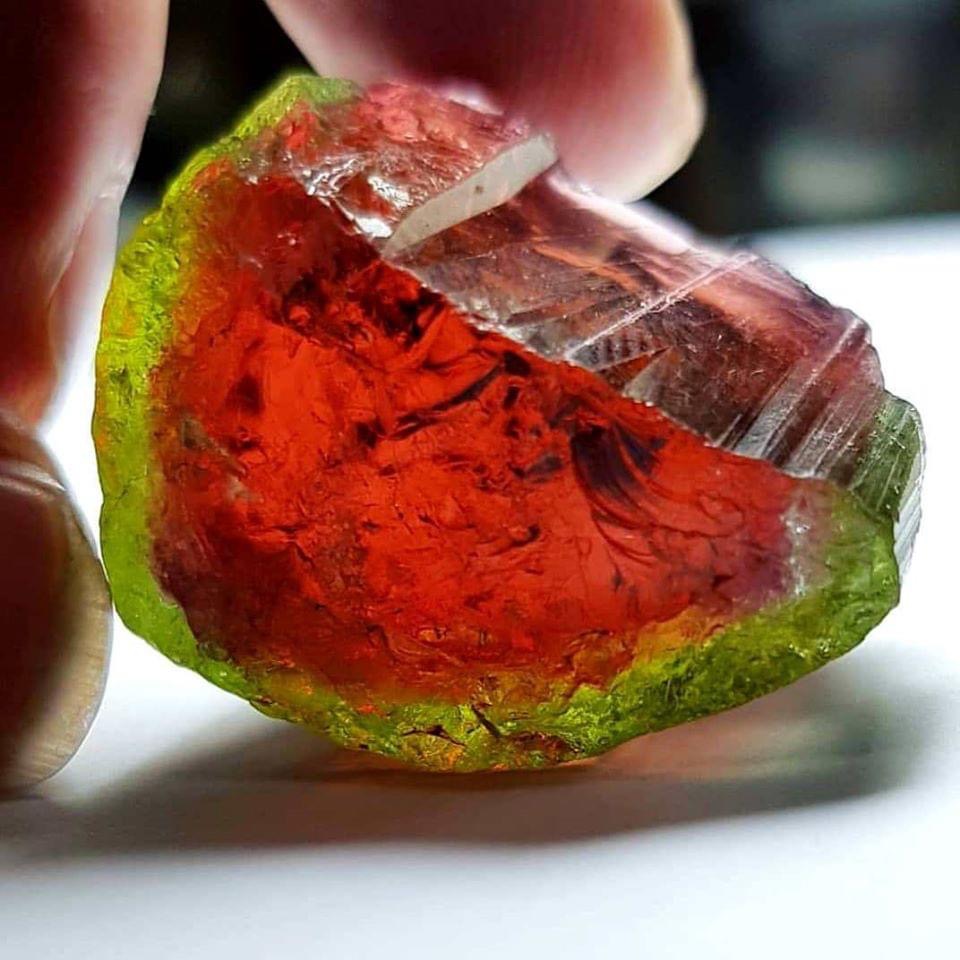
This is a mineral tourmaline exhibiting a green outer layer and red inner layer that it looks like a slice of watermelon. (Source: Amazing Geologist, FB)
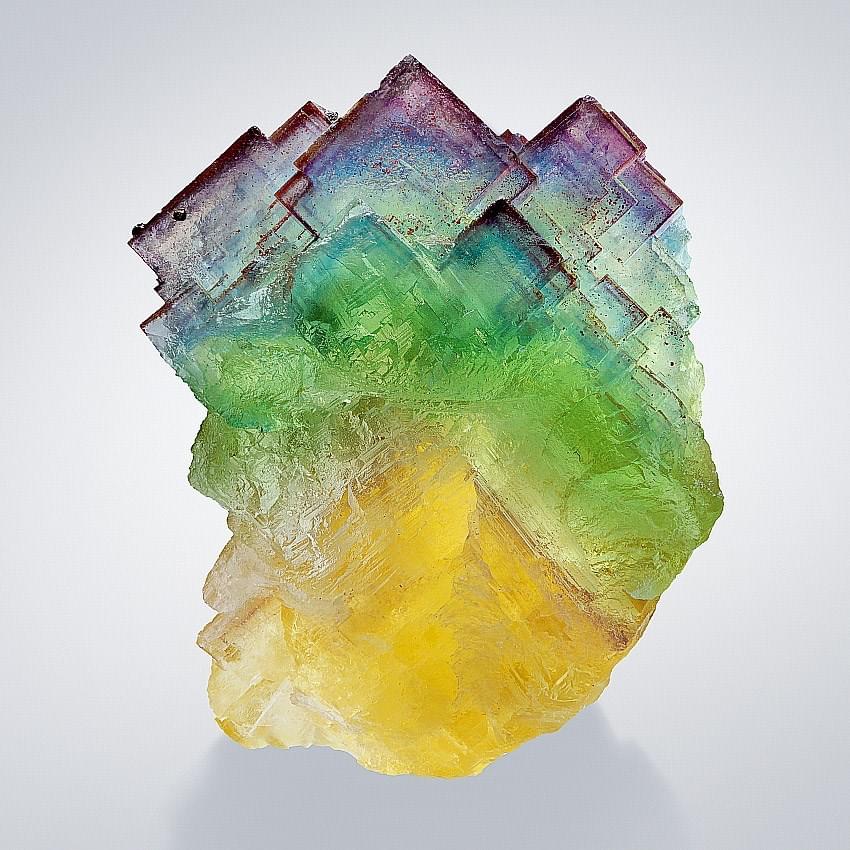
This specimen shows fluorite crystals in colors of yellow, light green, teal and purple.
Streak
Have you ever read the phrase, “not all that glitters is gold”? This expression is specially true in the case of the mineral pyrite which looks like gold on the outside to a layman. But if you rub the pyrite against a piece of ceramic tile, the mark it will leave is dark grey. Streak is the color of a mineral in powdered form – when hammered to smithereens or when rubbed against an unglazed tile. The real gold mineral will exhibit a streak of yellow.
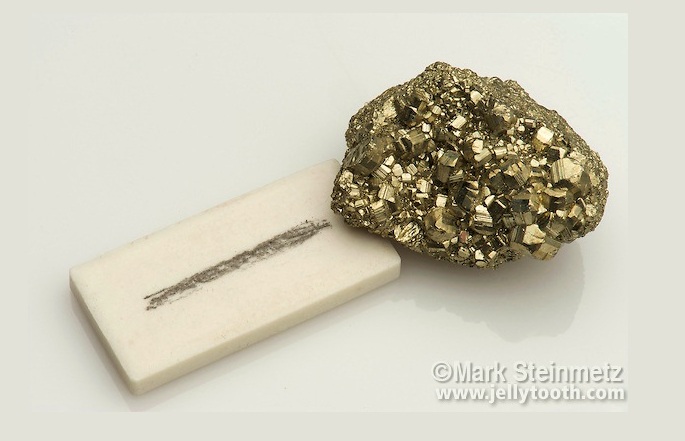
Although the mineral pyrite looks gold yellow on the surface, it’s streak when rubbed against a tile is grey. (Image source: http://www.geologyin.com/2017/02/how-to-identify-common-minerals.html)
Luster
Luster describes the way a mineral bounces off the light on its surface. When geologists describe luster, we use mainly self-explanatory terms such as dull (or earthy), metallic (as in metal like gold and silver), pearly (like pearls), glassy (like glass), greasy (oily appearance), and silky (like silk). Photos below are examples of minerals showing different luster.
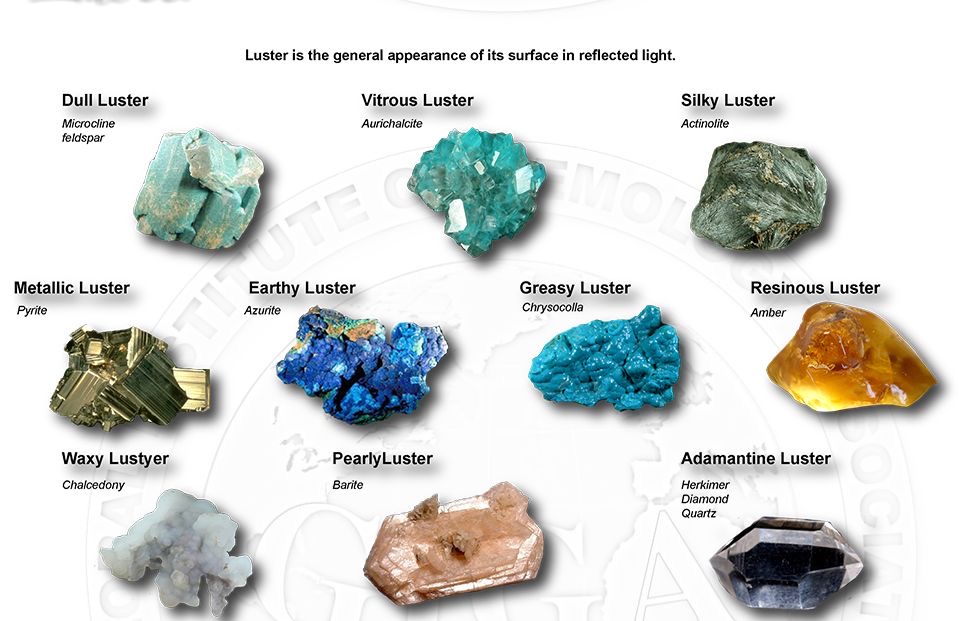
Minerals showing different luster. (Image source: Pinterest)
Transparency
Transparency refers to the way in which light passes through a mineral specimen. If light passes through a mineral, then it is transparent. If light passes only partially and the object behind the mineral cannot be seen, then it is translucent. If no light can pass through a mineral, then it is opaque.
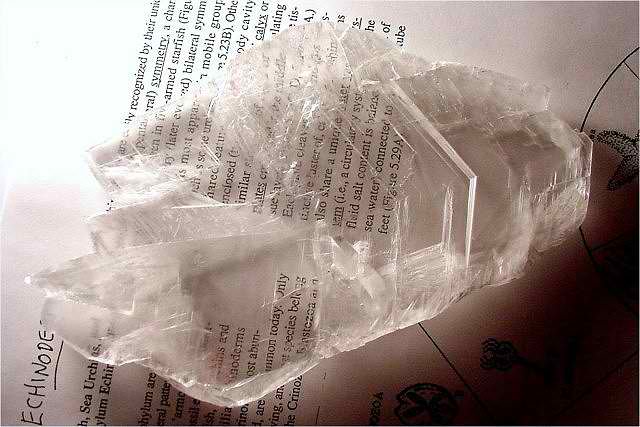
This mineral gypsum is transparent so that you can see the text through it. (Source: http://skywalker.cochise.edu/wellerr/mineralid/lecture.htm)
Remember the tourmaline mineral above that looks like a slice of watermelon? That mineral is translucent. Most metallic minerals such as pyrite and gold are opaque as light cannot pass through them.
Activity:
To parents: Print the photo below and have your student describe at least five of the minerals below in terms of color, transparency and luster. Have your child put a number beside the mineral being described for easy reference. Also, make a guess on the color of the streak if you rub the mineral against a tile. If you have rocks whose minerals are big enough for extraction, take some off and rub against an unglazed tile. Write your observations on a notebook. 🙂

Mineral pebbles. (Source: Amazing Geologist)
Habit
Habit simply describes the characteristic appearance of a crystal. Minerals exhibit different habits, listed below are just some of them:
Acicular – slender needle-like mass
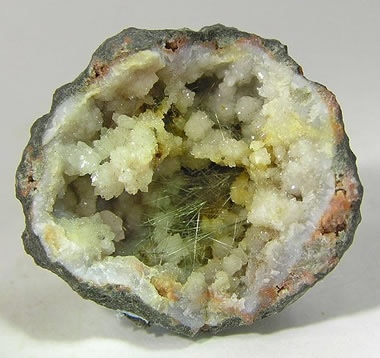
The mineral, millerite, inside this geode exhibits acicular habit. (Source: https://geology.com/minerals/crystal-habit/)
Dendritic – like roots of plants
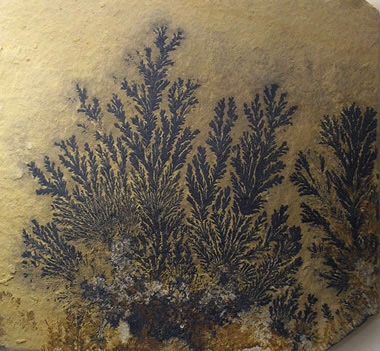
These fine crystals of pyrolusite exhibit a root-like pattern called dendritic.
Cubic – like cubes
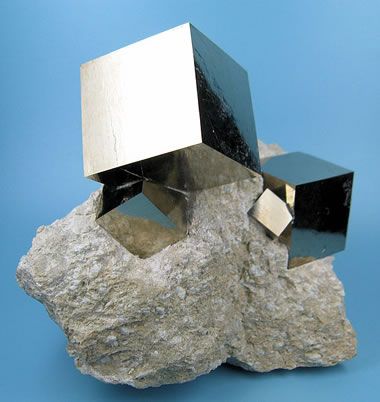
These pyrite minerals exhibit perfect cubic forms. (Source: https://geology.com/minerals/crystal-habit/)
Bladed – like the blade of a knife
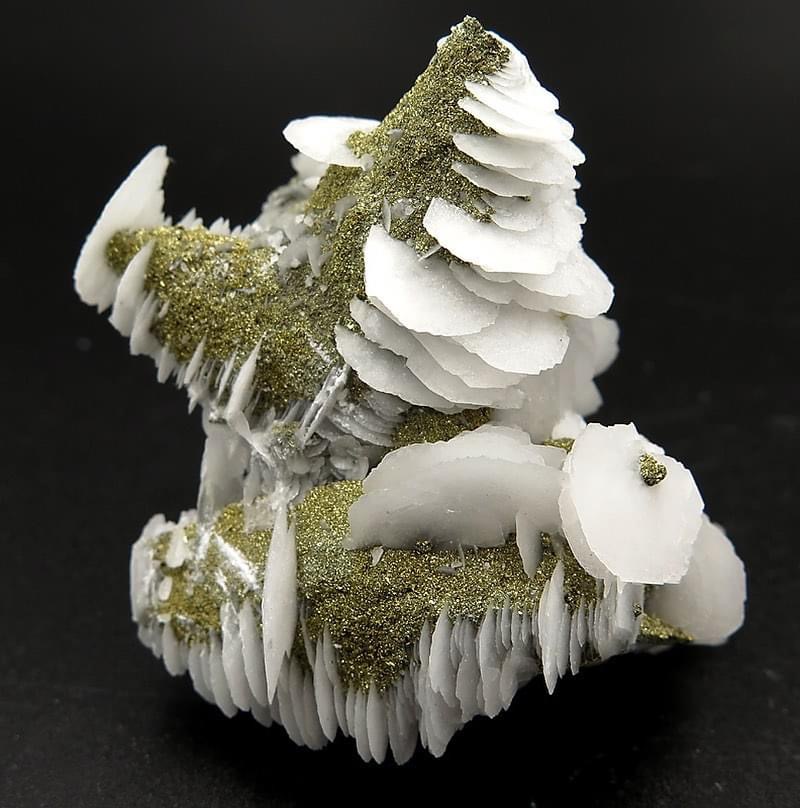
The white calcite minerals in the specimen above exhibit a bladed habit. The fine greenish yellow minerals are pyrite.
Botryoidal – like grapes
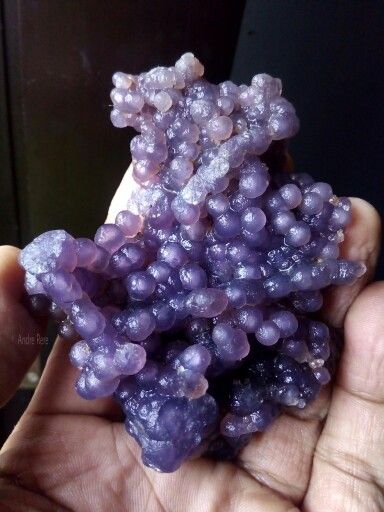
This chalcedony mineral exhibits botryoidal habit and grape color. (Source: Pinterest)
Massive – no definitive shape as in the case of serpentine mineral below:
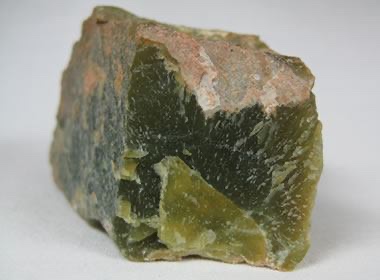
A specimen of massive serpentine mineral (Source: https://geology.com/minerals/crystal-habit/)
Prismatic – uniform elongated shape like a prism
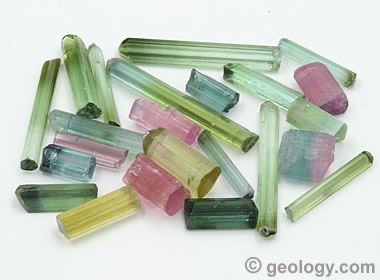
These tourmaline minerals exhibit perfect prismatic forms. (Source: https://geology.com/minerals/crystal-habit/)
Rosette – a cluster of bladed minerals forming a rose-like pattern as in the case of calcite specimen below:

Rosette calcite with fluorite (purple) and quartz (transparent). (Source: Amazing Geologist)
To guide you and your parents on how to do the two activities mentioned above, here’s a video to watch to give you a recap of the lesson and a peak into some of my rock and minerals collection. I’d also appreciate it if you follow this blog and subscribe to my channel to keep you updated on my latest posts and videos. See you in my next lesson! 🙂
If you enjoyed this blog post, you might also want to read about how to know if your place of work or residence is prone to natural hazard through Hazard Hunter web-based app and how to prepare a Go Bag as part of disaster preparedness.
Discover more from The Fabulous Scientist
Subscribe to get the latest posts sent to your email.
